How does vulnerability scanning work: the hidden mechanics and blind spots
Vulnerability scanning often fails not because of missing signatures, but because network controls and application logic block the scanner from seeing the true state of the system.

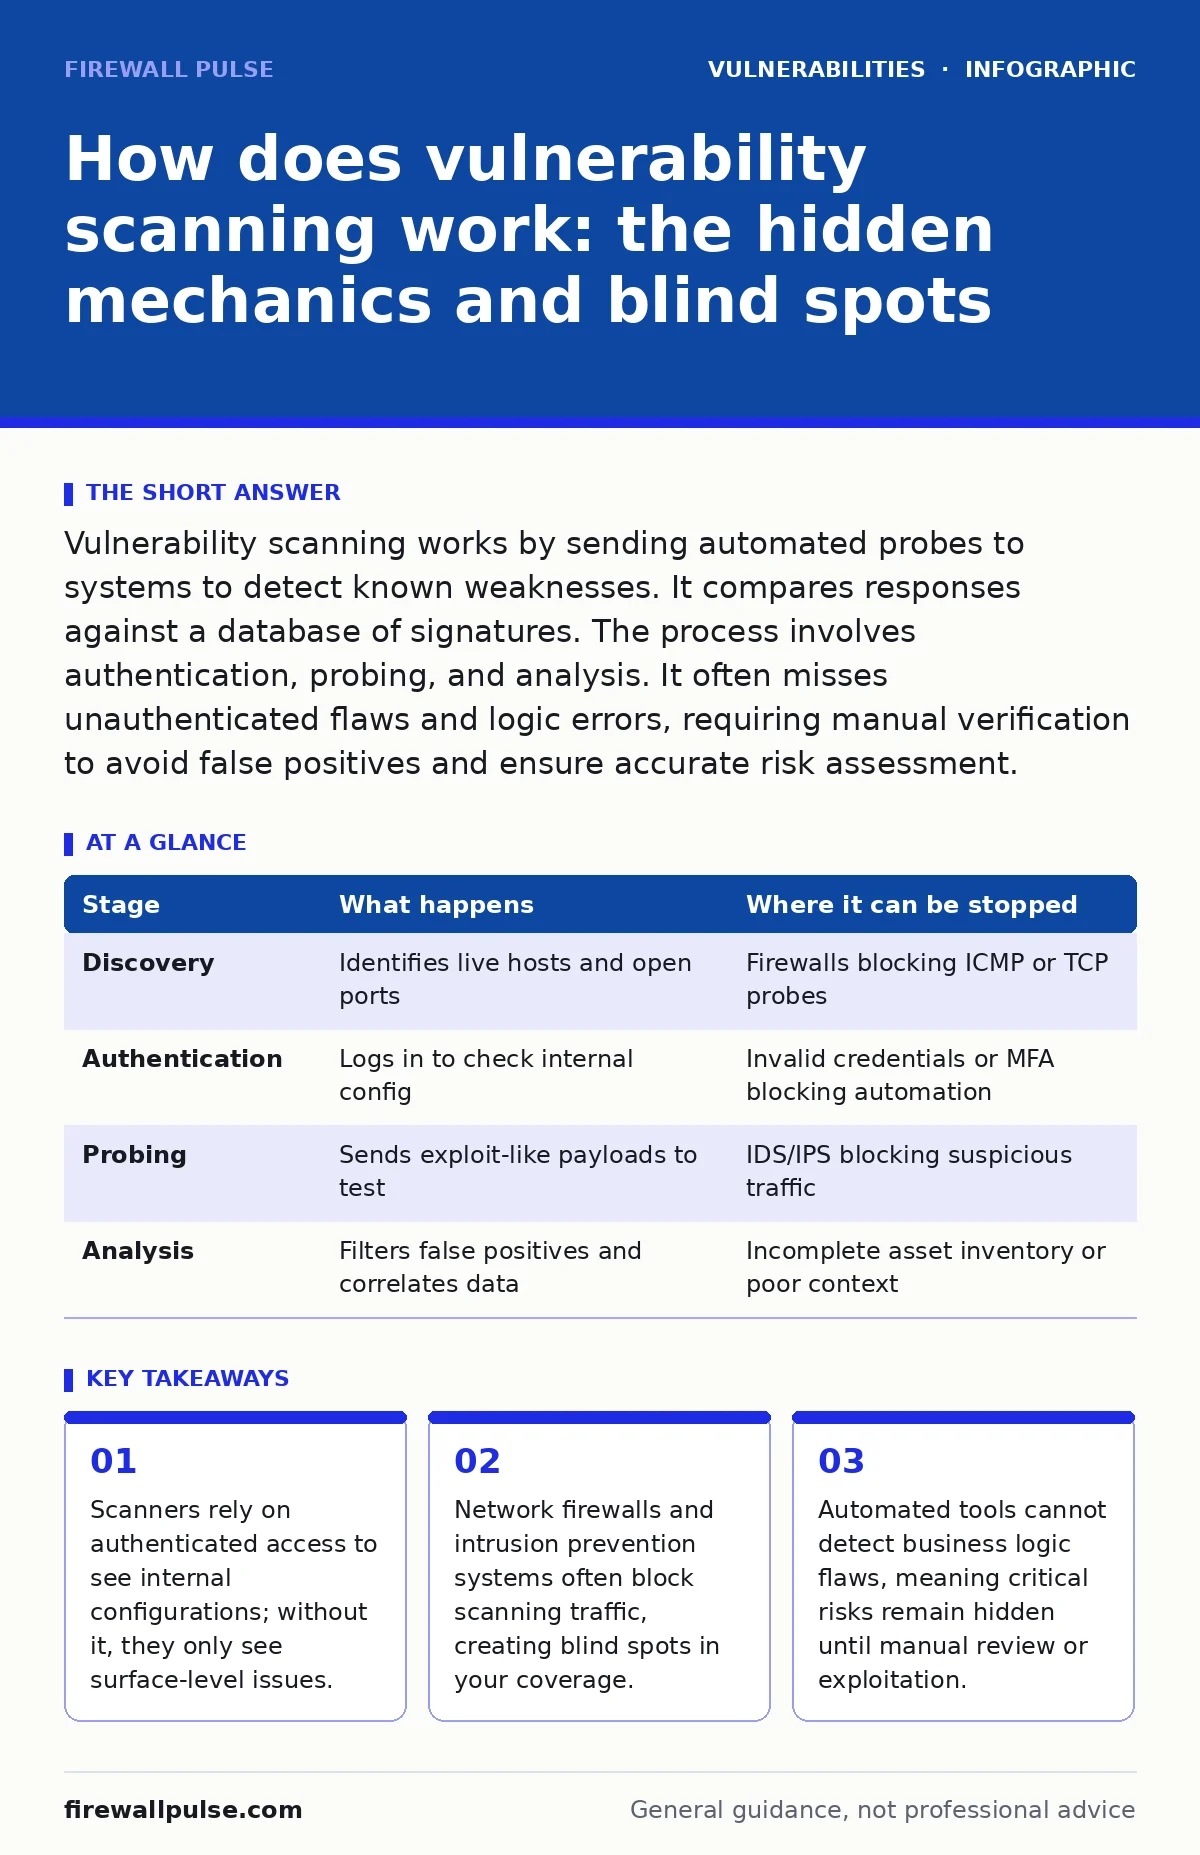
Vulnerability scanning works by sending automated probes to systems to detect known weaknesses. It compares responses against a database of signatures. The process involves authentication, probing, and analysis. It often misses unauthenticated flaws and logic errors, requiring manual verification to avoid false positives and ensure accurate risk assessment.
How does vulnerability scanning work
Vulnerability scanning works by systematically probing your network assets to identify known security weaknesses. The scanner sends specific requests to hosts and analysers the responses. It compares these responses against a massive database of known vulnerability signatures. This database contains details about software versions, open ports, and misconfigurations.
The goal is to map your environment’s surface area against known exploit patterns. This process provides a snapshot of your current exposure. It does not guarantee that no vulnerabilities exist. It only reports what the scanner was able to detect based on its current knowledge base. Understanding the mechanics helps you interpret the results correctly. You must know what the tool can and cannot see.
Stage 1: Discovery and Asset Identification
The scanner first identifies live hosts and open services on your network. It uses standard network protocols like ICMP and TCP to find active devices. This phase builds a map of your attack surface. The scanner records IP addresses, operating systems, and running services. It often uses banner grabbing to determine software versions.
This information is critical for the next steps. If the scanner misses a host, that host remains unchecked. Dynamic IP addresses can cause hosts to be missed between scans. Cloud environments complicate this further with ephemeral instances. You must ensure your scanning scope includes all active subnets. Missing an asset means missing the vulnerabilities it holds.
Stage 2: Authentication and Credential Handling
Authenticated scanning provides a much deeper view than passive probing. The scanner logs into systems using provided credentials to check internal configurations. It can read registry keys, installed packages, and local file permissions. Without authentication, the scanner only sees what is exposed externally. This limitation creates a significant blind spot.
Internal misconfigurations remain hidden. You should provide read-only service accounts for each target. These accounts allow the scanner to verify patch levels accurately. Poor credential management can lead to failed scans. If the scanner cannot log in, it assumes the system is vulnerable or unpatched. This leads to false positives that waste your time.
Stage 3: Active Probing and Signature Matching
The scanner sends crafted packets to test for specific vulnerabilities. It looks for known triggers that cause unique responses. For example, it might send a request that exploits a buffer overflow to see if the server crashes. It matches the response against its signature database. This step is where most detection occurs.
The scanner checks for outdated software versions and missing security updates. It also looks for default configurations that are known to be insecure. This process can be resource-intensive. It may trigger alerts on intrusion detection systems. You must coordinate with your network team to allow scanning traffic. Blocking this traffic stops the scanner from working correctly.
Stage 4: Analysis and False Positive Filtering
Raw scan results contain many false positives. The scanner may report a vulnerability that does not exist. This happens when the scanner misidentifies a software version or a configuration. The analysis step filters out these errors. It correlates findings with context from previous scans. It checks if the vulnerable service is actually accessible. It also verifies if a patch is truly missing. This step reduces noise in the report. It helps you focus on real risks. Automated filtering is not perfect. You must manually verify critical findings. Relying solely on automated analysis can lead to missed risks. Human review adds a layer of accuracy that tools cannot provide.
| Stage | What happens | Where it can be stopped |
|---|---|---|
| Discovery | Identifies live hosts and open ports | Firewalls blocking ICMP or TCP probes |
| Authentication | Logs in to check internal config | Invalid credentials or MFA blocking automation |
| Probing | Sends exploit-like payloads to test | IDS/IPS blocking suspicious traffic |
| Analysis | Filters false positives and correlates data | Incomplete asset inventory or poor context |
See also: Out-of-band patches: what small businesses need to know · Patching Without Panic: Secure Change Management for Small Teams
Stage 5: Reporting and Prioritisation
The final step generates a report of all findings. It ranks vulnerabilities by severity. It provides details on how to fix each issue. You must prioritise based on exploitability and impact. Not all vulnerabilities are equal. A low-severity flaw on an internet-facing server is more dangerous than a high-severity flaw on an internal machine. Context matters. The report should highlight the most urgent risks. It should provide clear remediation steps. You need to integrate these findings into your workflow. Ignoring the report renders the scan useless. Actionable intelligence drives security improvements.
The Hidden Costs of Automated Scanning
Automated scanning has limitations that many teams overlook. It cannot detect logic flaws in applications. It cannot understand business context. It may miss vulnerabilities in custom code. It also struggles with complex configurations. For example, it may not understand how different components interact. This means some risks remain hidden. You must supplement scanning with other methods. Penetration testing and code review fill the gaps. Scanning is a starting point, not a solution. It provides data, not security. You must interpret the data correctly.
Managing Scan Results Effectively
Effective management requires a clear process. You must define who is responsible for each finding. You must set deadlines for remediation. You must track progress over time. Integration with your ticketing system helps. This ensures findings are not lost. Regular scans keep your data current. New vulnerabilities emerge constantly. You must update your scanner’s signatures. You must also review your scanning scope regularly. Assets change, and new services are deployed. Keeping your inventory accurate is key. Inaccurate inventories lead to incomplete scans.
Key takeaways
- Scanners rely on authenticated access to see internal configurations; without it, they only see surface-level issues.
- Network firewalls and intrusion prevention systems often block scanning traffic, creating blind spots in your coverage.
- Automated tools cannot detect business logic flaws, meaning critical risks remain hidden until manual review or exploitation.
Frequently asked questions
Can vulnerability scanning detect zero-day vulnerabilities?
No, vulnerability scanning relies on known signatures. Zero-day vulnerabilities are unknown, so scanners cannot detect them. You must use other controls like intrusion prevention and behavioural analysis to mitigate zero-day risks.
How often should I run vulnerability scans?
Frequency depends on your environment’s change rate. Critical systems should be scanned weekly. Less critical systems can be scanned monthly. Continuous scanning is ideal for dynamic environments. Regular scans ensure you catch new vulnerabilities quickly.
Do I need authenticated scanning for all systems?
Authenticated scanning provides deeper visibility but requires credentials. Use it for critical internal systems. External-facing systems may not support authentication. Unauthenticated scans are safer for external targets. Balance depth with risk and access constraints.
How do I reduce false positives from scans?
Verify critical findings manually. Tune your scanner to exclude known safe configurations. Update your asset inventory to provide context. Integrate scan results with your SIEM for correlation. Regular review and tuning improve accuracy over time. BOTTOM LINE: Vulnerability scanning reveals known weaknesses but misses logic flaws and unauthenticated risks. Integrate scan results into a manual verification and remediation workflow to reduce false positives and address real threats.
How this guide was produced: written by the Firewall Pulse editorial team with AI assistance, checked against the public references listed below, and reviewed when the facts change. See our editorial policy or report an error.